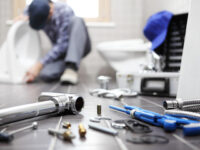
Plumbers Are Your Best Bet For Water Heater Repair
Plumbers Aurora CO are your best bet when you have issues with your hot water heater. They are trained to handle problems with gas, electric, and tankless water heaters.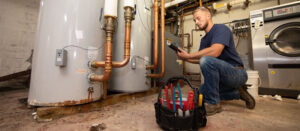
Some of the most common problems include a lack of hot water, odd smells or discoloration, and noises. Here are some tips for troubleshooting your water heater repair:
The thermocouple is an important safety device that is found on all gas-powered water heaters. It is basically two strips of metal that are attached near the pilot light as part of the burner assembly. It serves to detect if the pilot flame is burning, and if it fails, then the thermocouple will close off the gas valve automatically, preventing unburned gas from spilling out and causing an explosion.
Replacing a thermocouple is fairly simple, but it must be done after shutting off the gas supply to the tank and opening up the burner compartment. This allows you to disconnect the two gas tubes from the thermocouple and also lets you clean out the burner ports. You can find a thermocouple for under $20, and you will probably save the most money by replacing it yourself.
There are several reasons why the thermocouple might not be working properly. Soot and other debris might be blocking it, or it might have simply worn out. To check for this, connect one multimeter lead to the copper tube with an alligator clip and touch the other lead to the nut that connects it to the gas valve. If the meter reads less than 20 mV, the thermocouple is broken and needs to be replaced.
Turn off the gas supply to the water heater, and use an open-ended wrench to loosen and then remove the nut that secures the thermocouple to the controller. This should be located at the top of the burner assembly, and you will probably need to use a step ladder to reach it. You should also turn off the gas valve on the main gas line to the house.
After removing the old thermocouple, carefully unroll and coil the replacement. If there was a clip holding the old sensor to the pilot flame tube, take note of where it was so that you can clip the new one into place in the same location. Then route the copper tubing, making any necessary bends to get it in place and near its screw-in connection to the gas valve.
Element
Most homeowners tend to take their water heaters for granted. After all, it works just fine for most of the year, so we don’t think much about it until something goes wrong. Suddenly, it becomes hard to take a hot shower or wash dishes. Water may smell strange or be discolored, making it unfit for drinking or using in the kitchen. This is when you know it’s time to call a professional for water heater repair.
Most electric storage-type water heaters have two heating elements located at the bottom and top of the tank. When an electrical current runs through them, they heat up and allow hot water to flow into the tank. Several things can go wrong with the elements. They can become burned out, or they can simply break down. In either case, they need to be replaced.
The heating element is usually a relatively inexpensive part that can be easily replaced by a Carter professional. But before removing and replacing the element, first check the circuit breaker in your service panel to make sure it hasn’t tripped. Also, press the reset button on the high-temperature cutoff located on your heater’s access panel, just above the upper thermostat.
If you still don’t have enough hot water, it could be an issue with the temperature and pressure valve (TPV). This valve is designed to release excess pressure inside your tank. It must be checked and cleaned annually to ensure it’s working properly. If it’s corroded or blocked with sediment, it could cause the tank to leak.
You should also drain your water heater at least twice a year to remove sediment and debris. If you don’t do this, the sediment can build up and lead to a leak or cause your heater to overheat.
Dip Tube
A dip tube is a small plastic pipe that fits into the cold water inlet of your water heater. It’s designed to bring in cold water from the bottom of your tank and move it up towards the gas burner or electric heating element at the top of the tank. This prevents the cold water from mixing with the hot water and reducing your supply of steamy, hot showers.
It’s also used to reduce the amount of sediment that builds up inside your water heater tank. You can see a dip tube on the front of your water heater tank, or you can locate it by looking at the serial number on the back of the tank (the first four numbers typically display the month and year that your tank was made).
You can usually replace a dip tube yourself. It is a very inexpensive part that can save you the cost of hiring a professional plumber. Before you start, make sure that the power to your water heater is off by turning off the electricity at the circuit breaker or at the fuse box. Also, shut off the cold water supply valve to your water heater.
Modern dip tubes are made of non-metallic materials like plastic that withstand corrosion and do not interfere with the sacrificial anode on your water heater. Some brands, such as Bradford White, even have curved tubes that create a swirling motion within the water tank that can reduce the amount of sediment that builds up in the bottom of your water heater.
If your dip tube breaks, you will notice that there is less hot water available for your showers. You may also experience a sludge-like material in your hot water faucets. These tubes are made of petroleum-based plastic and can disintegrate in hot water, especially 140-degree water. The tiny pieces that slough off of the dip tube can then clog your plumbing.
Luckily, a broken dip tube is easy to fix. You can easily pull it out by sticking your finger into the end of the dip tube and pushing up on it with a little force. You can also hook the metal ring on the top of the tube using the handles of your pliers to pull it up and out of the heater tank.
Pressure Valve
As your water heats up, it expands and creates pressure inside the tank. When this pressure gets too high, the pressure-relief valve automatically opens to discharge water and lower the pressure to safe levels. This is an important safety feature that prevents a tank rupture that could flood your home.
The water heater’s pressure-relief valve is a metal rod or pipe that extends from the top or side of the water heater, usually pointing upward. The rod is connected to a water pressure gauge on the outside of the tank. If the pressure in the water heater rises above 125 psi, the gauge will “pop” and discharge hot water and steam through the tube. When the system has cooled down and the pressure is below 125 psi, the valve will close.
You should be able to hear this discharge, and you should be able to feel that the water pressure in your home has dropped. It is important to check the pressure-relief valve regularly to ensure that it works properly. The valve should be tested by standing clear of the outlet (the discharged water may be hot) and pulling back and releasing the lever handle.
If the lever snaps back into its original position, it is functioning correctly. If it stays open, the valve is leaking and will need to be replaced.
If you’re handy, you can change your water heater’s pressure valve yourself. However, it’s a good idea to have a professional examine your water heater and determine whether the pressure-relief valve needs replacing. If you are changing the valve, it’s a good idea to shut off your water heater and turn off the gas or electricity (if you have a gas model). Be sure to wear protective clothing and eyewear when working with hot water and gas. You should also have a bucket and pan on hand to catch the discharge water. It is recommended to use Teflon (R) pipe-thread tape when screwing in a new valve. This will help seal the leak and prevent corrosion. It is also a good idea to drain the old valve and replace the discharge pipe, if needed.